Shoulder Arthrography
Introduction
PreparationA shoulder arthrogram is a fluoroscopic examination of the shoulder joint following the introduction of contrast media into the joint. This page considers the procedures and techniques required to achieve shoulder arthrography with a C-arm fluoroscopy unit with digital spot imaging. The procedures and techniques will show considerable variation depending on local protocols including the Radiologist's preferences.
- Patient Identification (3 C's- correct patient, correct side, correct procedure)
- Is the patient pregnant?
- Does the patient have a history of contrast/iodine allergy?
- Is the patient intending to drive home after the procedure?
- Change patient into hospital gown if required
- Check departmental policy re signed consent by the patient to the procedure
- Ensure old imaging is on-hand/available
- Advise the CT scanning suite when you are about to start the procedure if CT arthrography is required after the fluoroscopy examination
Indications for Shoulder Arthrography
- assessment of the integrity of the rotator cuff
- assessment of shoulder instability
- for diagnosis of glenoid labrum tear
- for diagnosis of adhesive capsulitis
Contraindications for Shoulder Arthrography
- iodine allergy
- allergy to local anaesthetic agent
- non-consent
Procedure
1. Preliminary Views (control/scout views)
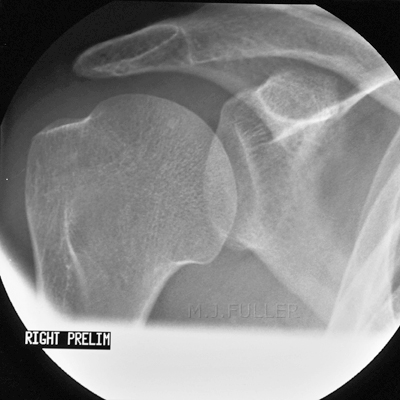
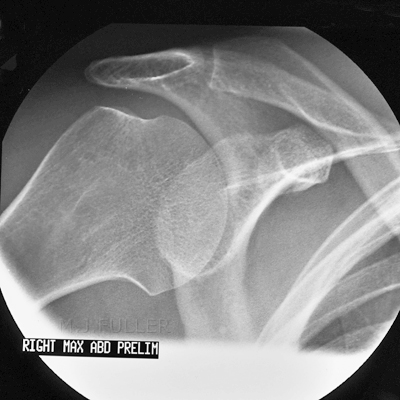
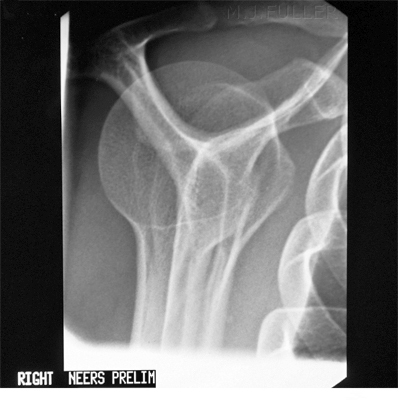
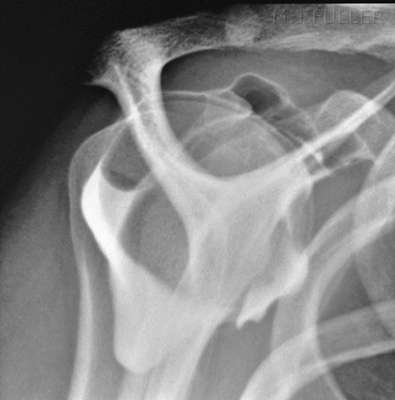
The preliminary/scout images are taken in the erect position. Select fine focus if available. There is considerable advantage in using the fluoroscopy unit to ensure that the subacromial views are positioned correctly. "These (scout) views are important to assess for calcium hydroxyapatite deposition in the rotator cuff. If calcium deposits are not identified before injection of contrast medium, they could be misinterpreted as extension of contrast agent into the rotator cuff and be misdiagnosed as a tendon tear" <a class="external" href="http://radiographics.rsnajnls.org/cgi/content/full/23/2/373" rel="nofollow" target="_blank"> (Jon A. Jacobson et al, Aids to Successful Shoulder Arthrography Performed with a Fluoroscopically Guided Anterior Approach, Radiographics. 2003;23:373-378)</a>
2. Needle Insertion and Contrast Injection
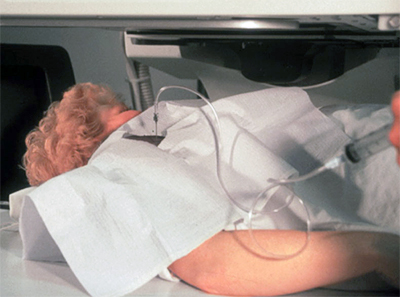
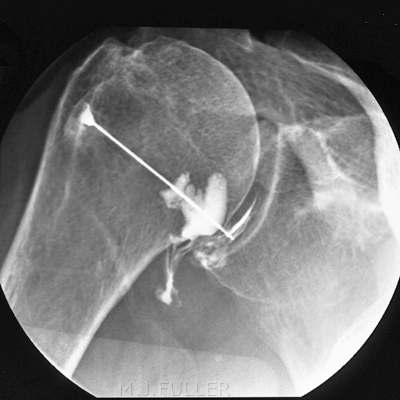
source: <a class="external" href="http://www.elcamino.edu/faculty/mcolunga/RT+255/Arthrography+SP+09.ppt" rel="nofollow" target="_blank">http://www.elcamino.edu/faculty/mcolunga/RT%20255/Arthrography%20SP%2009.ppt</a>The needle is commonly inserted using an anterior approach. The needle is directed towards the junction of the middle and inferior third of the glenohumeral joint. Single or double contrast studies may be undertaken. Care must be taken to ensure that air is not introduced into the joint if undertaking a single-contrast study.
It is good practice with all needle insertion procedures to position the needle in the centre of the fluoroscopic image to eliminate parallax error. When the needle is visualised at the centre of the needle hub on the fluoroscopic image and the needle is in the middle of the image, the radiologist can be confident of the exact needle position.Following the completion of the preliminary DSI images taken in the erect position, the patient is positioned supine on the fluoroscopic table with the shoulder of interest closest to the radiologist. It may be necessary to use the invert/flip image controls to achieve the correct fluoroscopic anatomy orientation. The needle can be inserted with the patient supine or with the patient rotated 45 degrees onto the affected shoulder and supported with a 45 degree positioning sponge under the contralateral shoulder. The 45 degree oblique position profiles the gleno-humeral joint. This position places the glenoid labrum in the path of the advancing needle and is therefore not recommended in most current texts. The patient's arm of interest is externally rotated into a true AP position (the elbow should be in an AP position). "External rotation of the shoulder exposes more of the articular surface of the humeral head anteriorly and increases the intraarticular area available for needle insertion from an anterior approach". <a class="external" href="http://radiographics.rsnajnls.org/cgi/content/full/23/2/373" rel="nofollow" target="_blank">(Jon A. Jacobson et al, Aids to Successful Shoulder Arthrography Performed with a Fluoroscopically Guided Anterior Approach, Radiographics. 2003;23:373-378) </a>
It can be useful to have the patient hold a sandbag to help immobilise the arm. Ensure that the anatomy of interest is within the reach/travel of the image intensifier- it may be necessary to move the patient such that the shoulder of interest is more central on the fluoroscopy table.
Centre the image intensifier over the shoulder joint of interest and briefly screen to check the position and beam collimation.
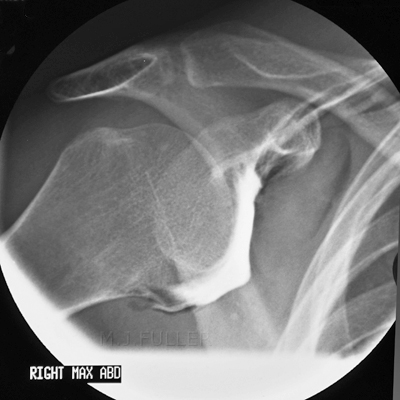
If the radiologist is satisfied with the position, he/she will localise the injection point with an opaque object (anything- forceps etc) and mark the injection site with a suitable marker (felt-tip marker). The radiologists will clean the injection site with betadine (or similar) and drape the shoulder with a sterile drape with a suitable access hole. The subcutaneous tissues will be anaesthetised with local anaesthetic and a 22 gauge spinal needle will be inserted with stylet insitu under fluoroscopic guidance. The radiologist may take a sample of joint fluid for laboratory analysis. Contrast medium is injected to confirm the correct needle position. Correct needle position is indicated by free flow of contrast away from the needle tip in a crescent shape following the humeral head. Pooling of the contrast around the needle tip suggests extra-articular injection of contrast. Alternatively, a small amount of local anaesthetic can be injected to assess free flow into the joint. When the needle is confirmed to be within the joint, 2-3 mls of contrast and 10mls of air are injected into the shoulder joint. Adrenaline may be added to the contrast medium to reduce absorption time.
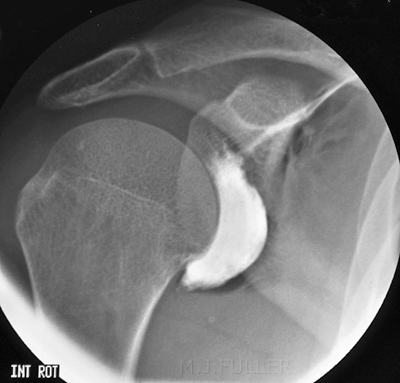
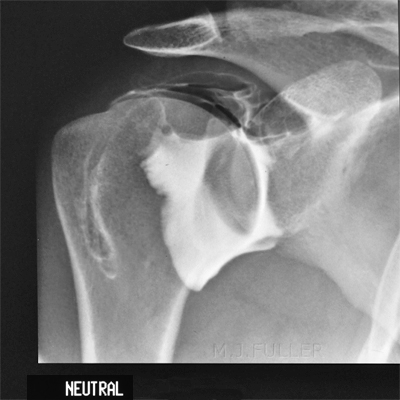
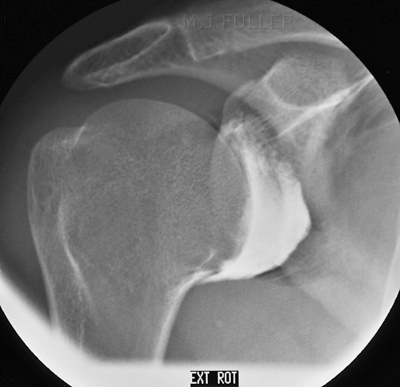
Following successful injection of contrast media, the radiologist will remove the needle. The patient is encouraged to move his/her shoulder to ensure the contrast agents have penetrated all recesses of the shoulder joint. The radiographer will then perform the post-contrast spot imaging using the image intensifier.
The post-contrast imaging may be repeated following shoulder exercises undertaken by the patient. CT scanning of the shoulder joint post contrast media injection and DSI imaging is highly desirable.
3. Digital Spot Imaging (DSI)
References
<a class="external" href="http://radiographics.rsnajnls.org/cgi/content/full/23/2/373" rel="nofollow" target="_blank">Jon A. Jacobson, MD, John Lin, MD2, David A. Jamadar, MB BS and Curtis W. Hayes, MD. Aids to Successful Shoulder Arthrography Performed with a Fluoroscopically Guided Anterior Approach. Radiographics. 2003;23:373-378.</a>
<a class="external" href="http://radiographics.rsnajnls.org/cgi/reprint/radiographics;23/2/379" rel="nofollow" target="_blank">
B. J. Manaster, MD, PhD. Invited Commentary. Radiographics, Volume 23 ● Number 2, p 379</a>
... back to the Wikiradiography home page
...back to the Applied Radiography home page
