Operative Imaging for Distal Radius Fracture Volar Plate Surgery

From wikiRadiography
Revision as of 17:22, 11 November 2020 by Travis (talk | contribs) (Created page with "<div class="WPC-editableContent"><br/><div align="center"><font size="5"><b><font color="#ff0000">--- under construction---</font></b></font></div><font size="5"><b>Introducti...")
(diff) ← Older revision | Latest revision (diff) | Newer revision → (diff)
Jump to navigation Jump to search

--- under construction---
Introduction

Good theatre radiography requires a sound knowledge of the radiographic equipment (mobile image intensifier is commonly used) and the surgical procedure. Radiographers who are familiar with the surgical procedure will require less direction- they are able to anticipate what is required and the operating theatre experience is more likely to be a meaningful professional experience. This page considers the reduction and immobilisation of a distal radius fracture via a case-study.

Anatomy


Case 1
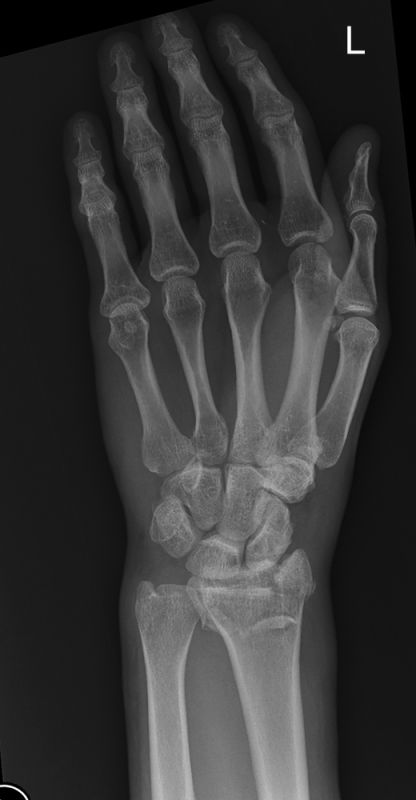
PA handThis 40 year old male presented to the Emergency Department following a motor vehicle accident. The patient was referrred for left wrist and hand radiography. There is a comminuted fracture of the distal radius.
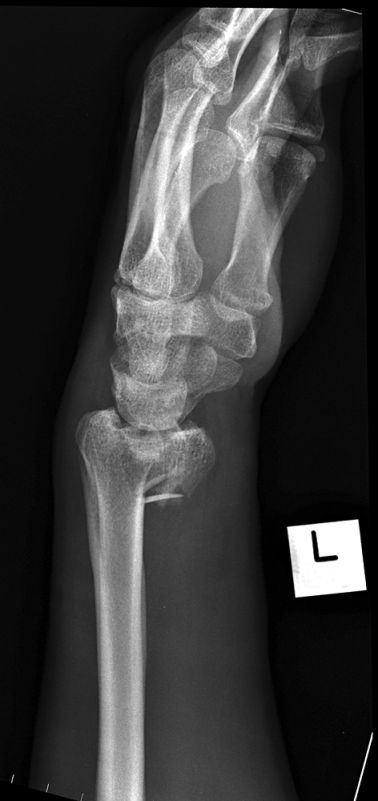
lateral wristThe lateral projection image demonstrates a large volar distal radius fragment.

The patient underwent surgical reductyion and fixation of the fracture with volar plate and screws.
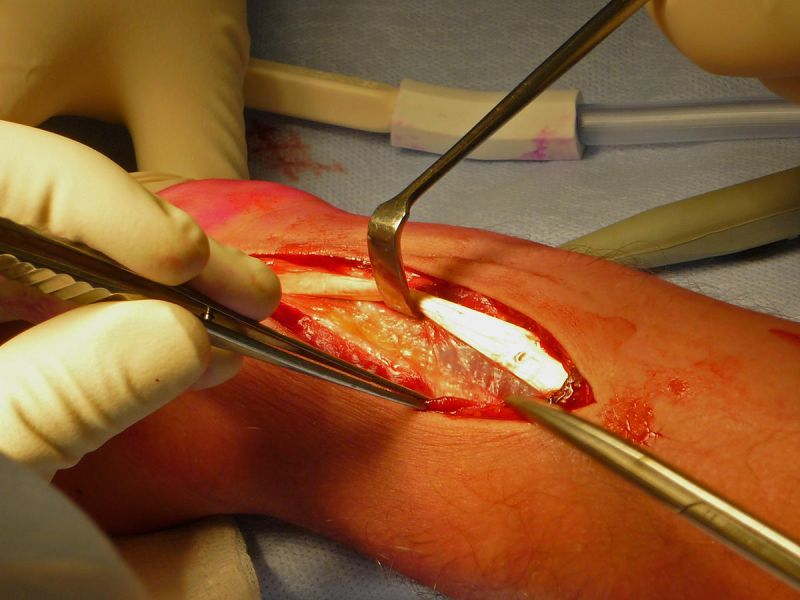
Volar Plate Surgery for Distal Radius FractureThe surgeon made an incision over the flexor radialus carpi (FRC) tendon. The FRC tendon is retracted to the ulnar side of the wrist.
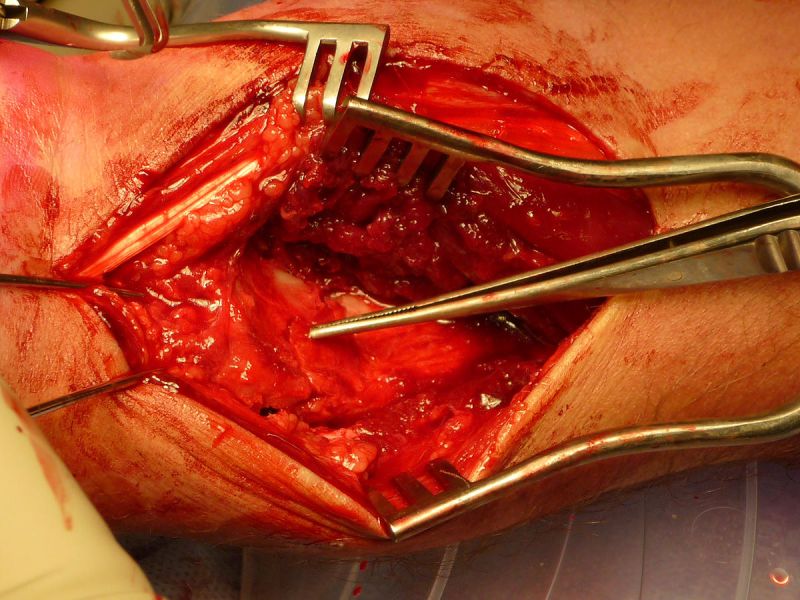
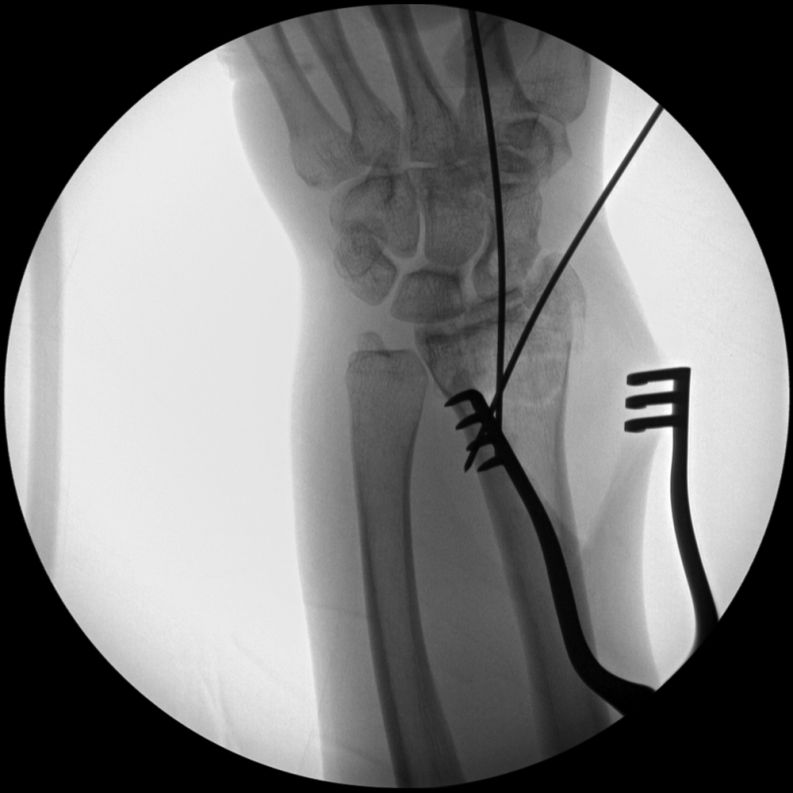
Volar Plate Surgery for Distal Radius FractureSelf retaining retractors (cats paws) are positioned to keep the incision open. The pronator quadratus was disected away from the radius and the brachioradialis tendon was released from its distal insertion. The fracture line and distal fragments were exposed. The distal fragment positions were adjusted and two Kirschner wires were inserted.

Place provisional fixation using k-wires
  • Holds fracture reduced
  • Demonstrated where screws will be going
operative wrist radiographyThe position of the distal fragments was checked with the image intensifier.
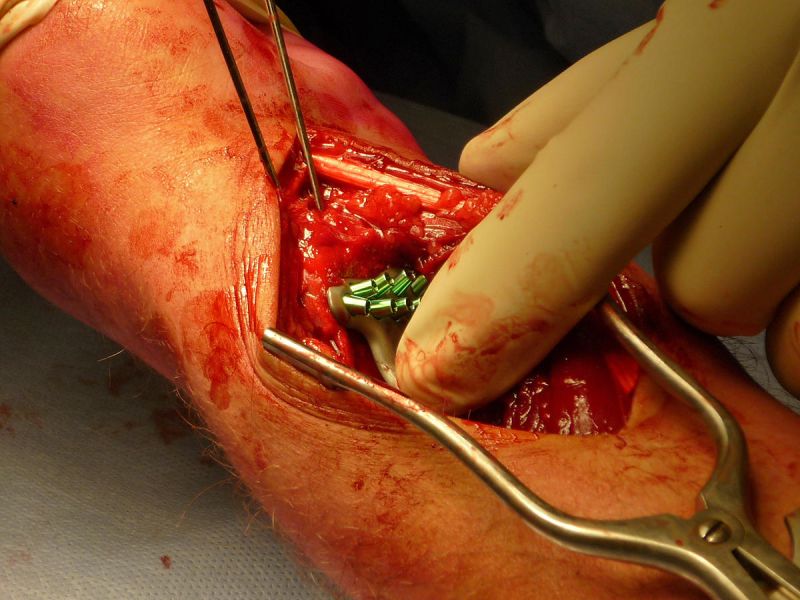
Volar Plate Surgery for Distal Radius FractureA left volar plate was selected and positioned to assess fit.
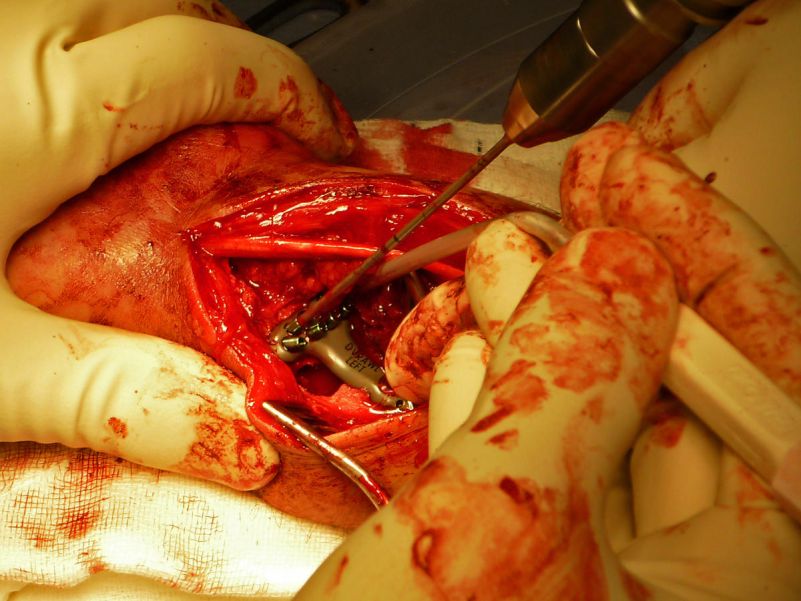
Operative Imaging for Distal Radius Fracture Volar Plate Surgery - wikiRadiographyUsing the Polyaxial Drill Guides built into the plate, holes were drilled for the screws
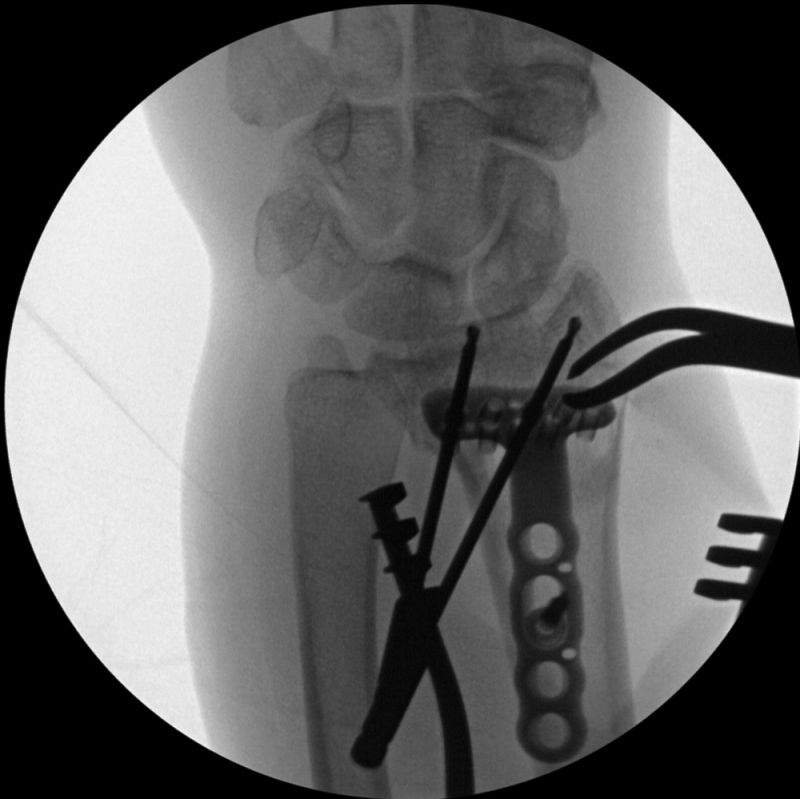
Operative Imaging for Distal Radius Fracture Volar Plate Surgery - wikiRadiographyThe drill bit position was assessed with the image intensifier. It is important that any discontinuity in the articular surface of the distal radius is minimised and the drill holes/screws are not intra-articular. Note that the first screw is placed in the oblong hole allowing the plate to be respotioned distally or proximally as required
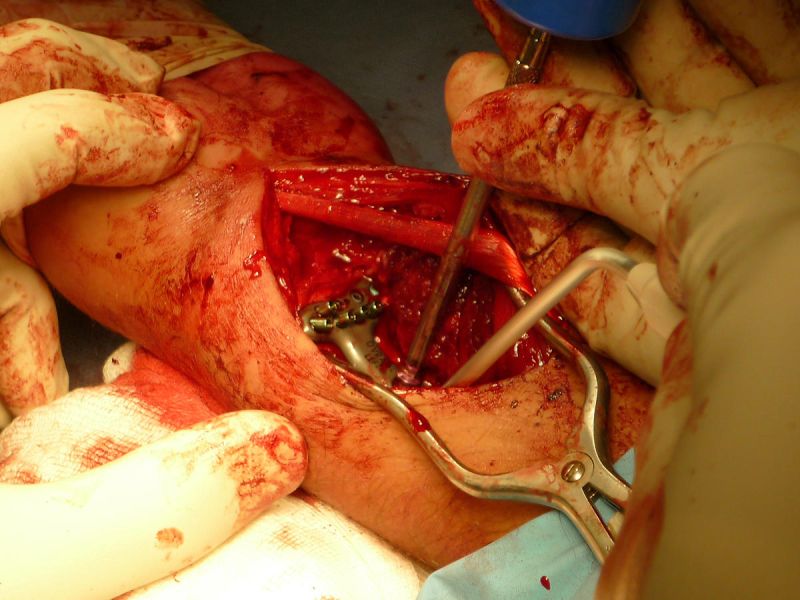
Volar Plate Surgery for Distal Radius FractureInserting proximal locking screws.
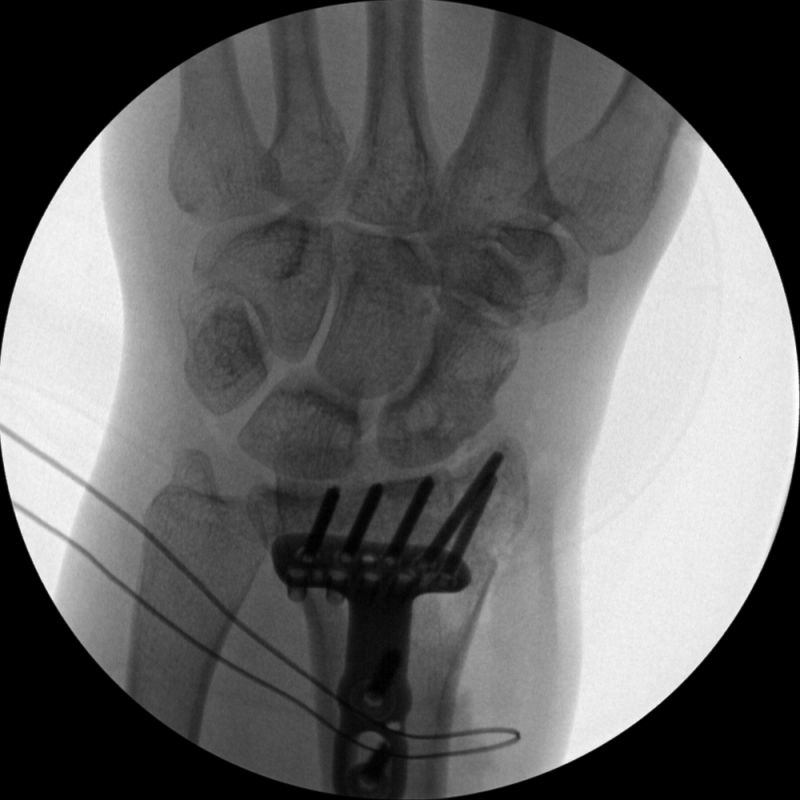
Operative Imaging for Distal Radius Fracture Volar Plate Surgery - wikiRadiographyThe final position of the volar plate and screws is shown.
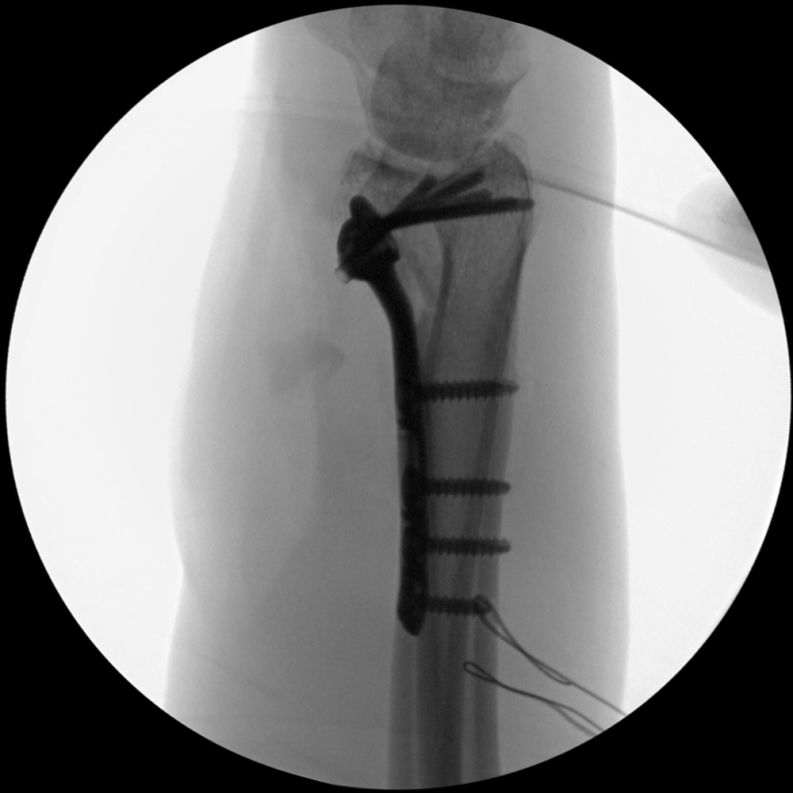
Operative Imaging for Distal Radius Fracture Volar Plate Surgery - wikiRadiographyFinal position, lateral projection.

Technique Notes

  • An overcouch technique should generally be used for small anatomy such as the wrist
  • Laser assisted centring should be employed if available.
  • Ask the surgeon where he/she would like the Image intensifier and screen positioned.
  • Use the minimum dose setting which will provide an adequate image.
  • The surgeon must be able to see the distal fragments clearly- it is important that the patient not be left with
    • a large step in the radial articular surface.
    • a large separation of fragments
    • radial shortening
  • Magnification (smaller field size) should be used if the anatomy is not sufficiently well demonstrated (the surgeon should not have to walk over to the image intensifier screen to see the image adequately). Equally, magnification should not be employed if not required because it increases patient radiation dose.
  • It is prudent to use a higher dose mode (higher quality) for the final images (only) which are kept as a record of the final position
  • You may note that the surgeon adjusts the PA and lateral wrist position to account for the palmar tilt (PA projection) and radial incination (lateral projection)- this will afford improved demonstration of the radiocarpal joint. (see discussion here)